-
January 14, 2026
- Share:
-

-

-

-

Let’s start with the bottom line.
Automated testing will never replace testers, even with AI.
It’s not here to take over the original thinking that only humans are capable of.
It’s here to take over the “run the same 70-step regression again because one developer changed a semicolon” nightmare that you might be living through.
The Current State of Automation Testing
Most teams use a combination of manual and script-based automation tools like Selenium to get the job done. While the latter eventually automated repetitive tests, both approaches are still slow, repetitive, and prone to human error. Without exceptionally talented engineers, current automation is also hard to scale in fast-paced CI/CD pipelines.
Realistically, most organizations operate with:
- Heavy manual, light automation: A few smoke/regression flows are automated, everything else is manually verified just before release.
- Script-heavy but fragile: Many Selenium/Playwright/Cypress suites are plagued with random failures, breaks on small UI changes, and technical expertise for maintenance.
- Patchwork tooling: One tool for UI, another for API, JMeter for load, a couple of homegrown dashboards, and Jenkins glued to all of it.
As of 2024, test automation has grown to 44% not even half. While all teams understand the need for automation, its implementation is incomplete and uneven.
The Skills and Tooling Gap
Most orgs don’t have access to unlimited automation engineering resources. The World Quality Report 2023–24 specifically calls out gaps in test automation, AI, and DevOps. In the real world, these gaps show up as:
- One or two automation “heroes” are overloaded with work.
- Manual testers who want to help but don’t have the coding background.
- Test assets are trapped inside complex frameworks, so no new projects can ramp up quickly.
- It’s hard to find people with the requisite technical skills to expand automation coverage.
AI to the Rescue?
No-code / low-code platforms (like TestWheel) let non-programmers author tests in natural language. You can generate tests from natural language instructions, repair failing locators, and convert manual cases or legacy scripts into maintainable automation.
Naturally, these platforms are gaining quite some attention. The World Quality Report 2024-25 shows that 71% of organizations have already integrated AI or Generative AI into their testing operations in some form.
Codeless Automation Testing for Beginners
Let’s talk about a realistic scenario in which you’re setting up your automated tests from scratch using TestWheel.
Fundamentally, TestWheel is an AI-powered, no-code test automation platform that enables fast end-to-end automated testing for web, load, API, and native mobile applications. You get all AI capabilities on the market today and more (AI test creation, self-healing, and script conversion).
Testers can automate user flows with codeless test creation, intelligent workflows, and built-in integrations with CI/CD tools like Jira, Azure DevOps, and more. It also delivers test management features to help QA leaders plan, track, and report across teams, all in one place.
Step-by-Step Guide: Set Up Automated Tests with TestWheel
Consider these steps (and watch the video). This is how easy it is to establish automated testing pipelines with this platform.
How to Create Your First Test Case
- Sign up for a free TestWheel account.
- Once you’ve registered, log in.
- You’ll land on the dashboard, which gives a high-level view of all testing activity with interactive charts tracking execution, pass/fail rates, and trends over time.

Note: TestWheel is built for collaborative testing. One admin can manage multiple testers and developers, all working on the same projects, for better visibility and teamwork.
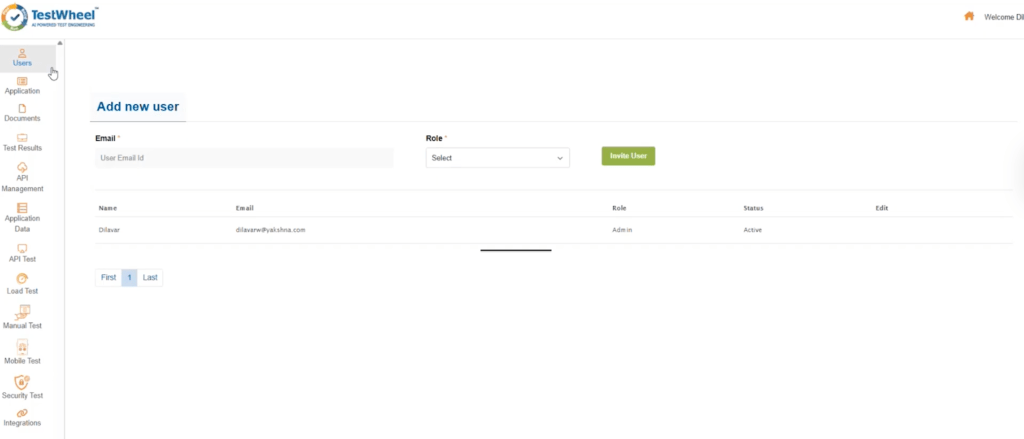
- Go to the “Users” page (top left). This is where you see everyone working on a project. Each person has a defined role (tester or developer) when working on the same project for better visibility and teamwork.
Next is the “Application” tab. This is the home base for all the apps you’ll be testing. Each row or application here represents a test or test workflow and shows the application name, type, description, and environment.
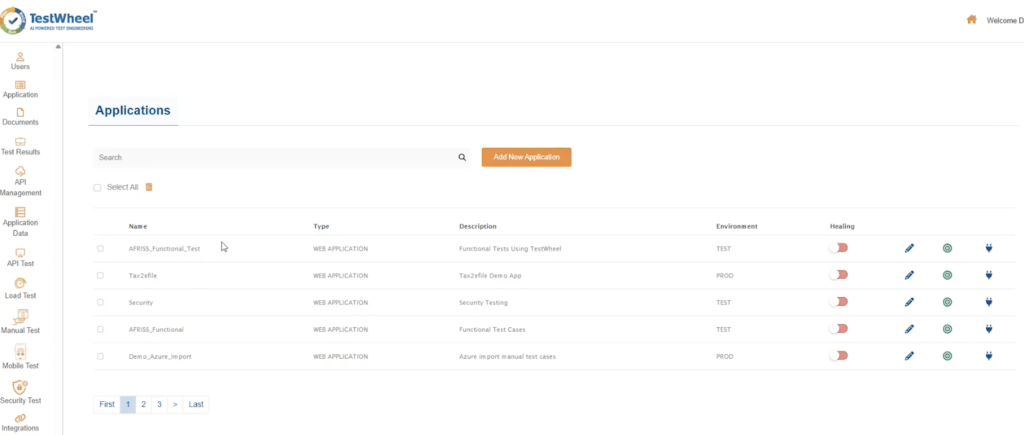
- This page is where you can edit tests, switch AI self-healing on and off, and initiate test execution.
Test Healing
Use the “Healing” switch to activate/deactivate AI augmented self-healing for your tests.

This feature takes a clean test run as a baseline, and for all future runs while it’s toggled on. The AI engine will check for any minor changes to UI locators and alter them. At the end of each test run, the AI also provides a report letting you know what changed and what it was changed to. Toggle this on or off using this run switch.
Test Editing
Use the pencil icon to change the description uh the type of test from web application to REST API. You can also choose the environment to run the test in.

Test Execution
Use the green play button at the end to initiate a test. Hover over it and select the browser that you want to run the test in. This will start your test.

Record & Playback
Use the “blue socket” button to initialize TestWheel’s Record and Playback mechanism.

Select the application you want to record data for, provide a URL, and carry out your test steps.

Once you finish recording a workflow using the record and playback feature, the tool will automatically populate the app’s backend with UI properties and user data sheets.
You can also export this test data. Navigate back to the “Applications” page, and you’ll be able to see all recorded data.
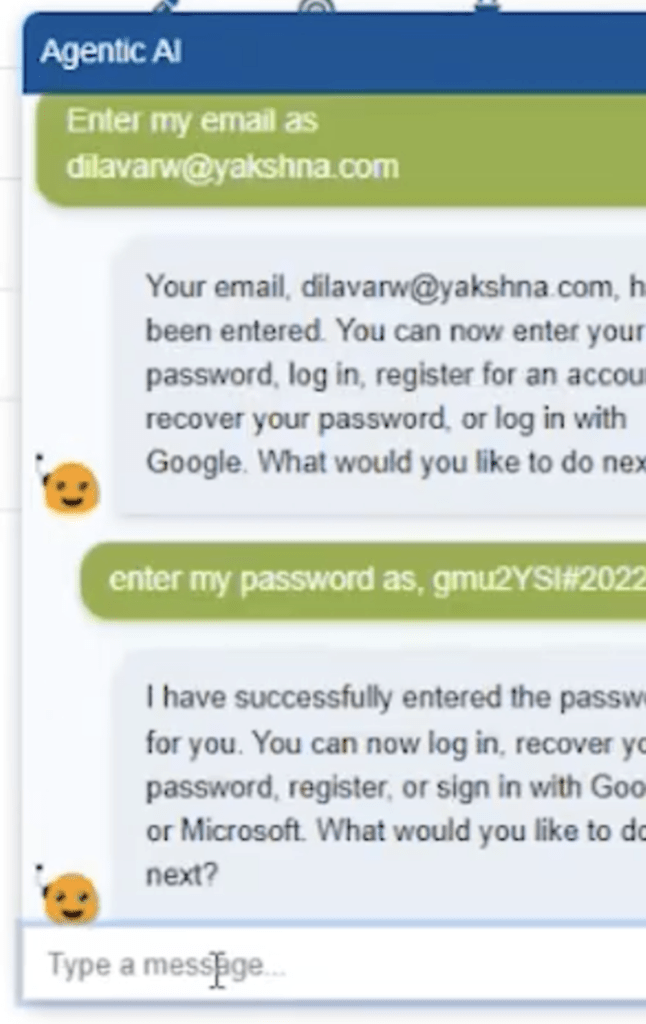
Agentic AI for Testing
TestWheel also offers a chatbot or Agentic AI engine to help create tests. The bot will assist with using the TestWheel platform and also with authoring test cases.
Just provide a URL, and a set of tests will be offered, from which you can select the one that fits your specs.
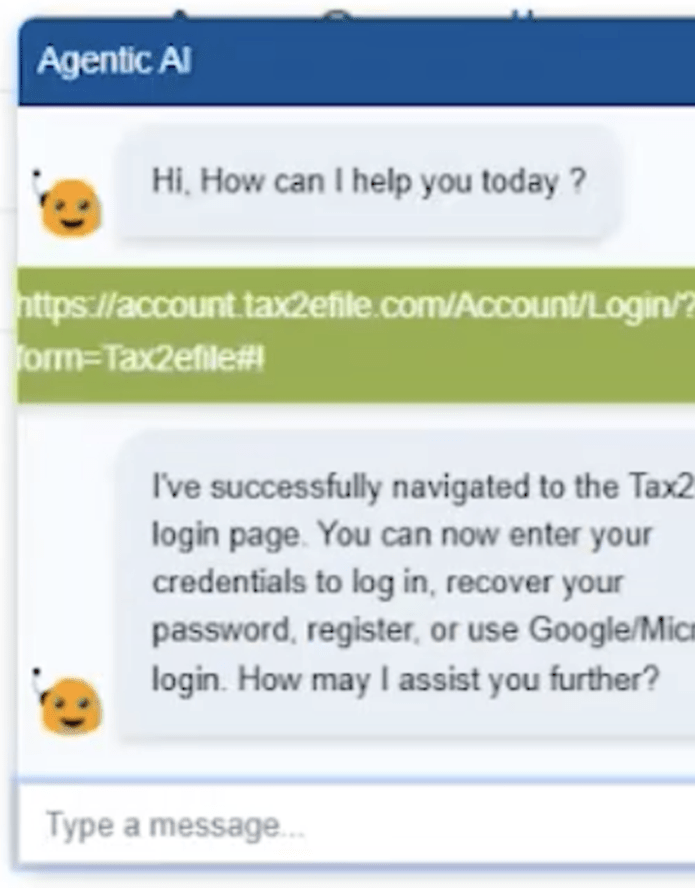
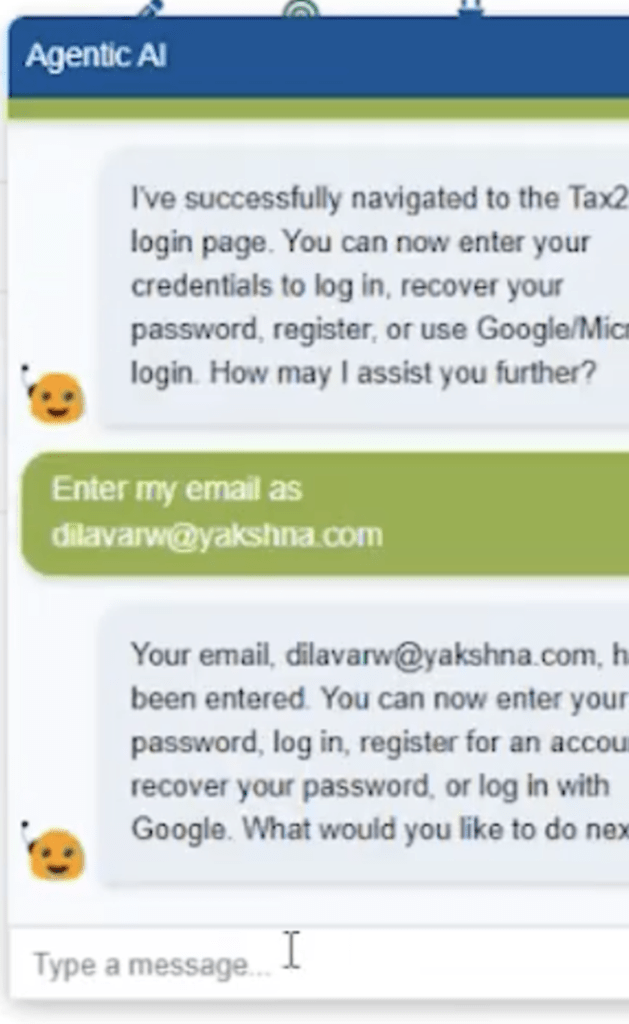
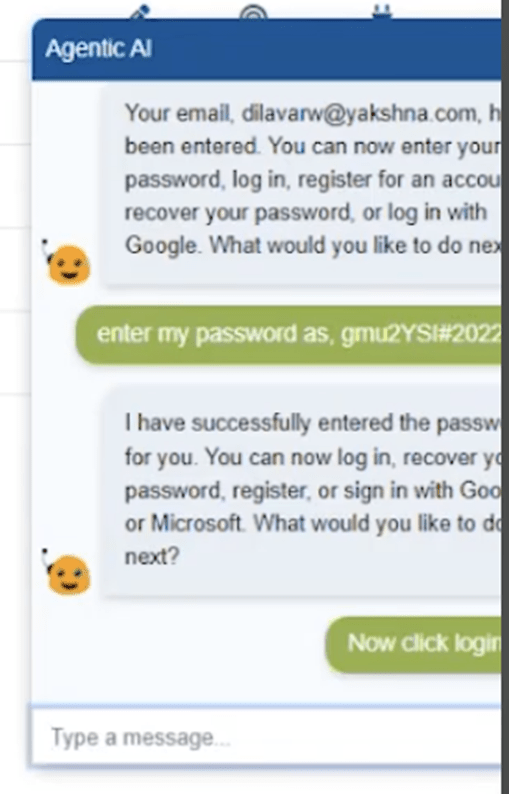
In this case, once the AI has received the URL, it navigates to the login page. The tester can enter their credentials to log in, recover their password, register, or use Google or Microsoft for single sign-on.
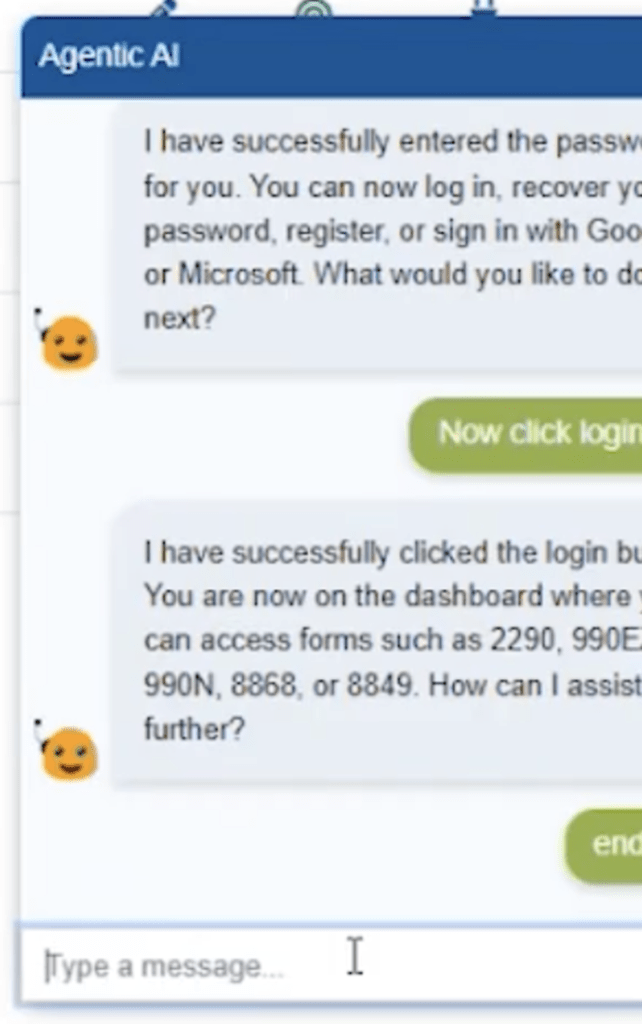
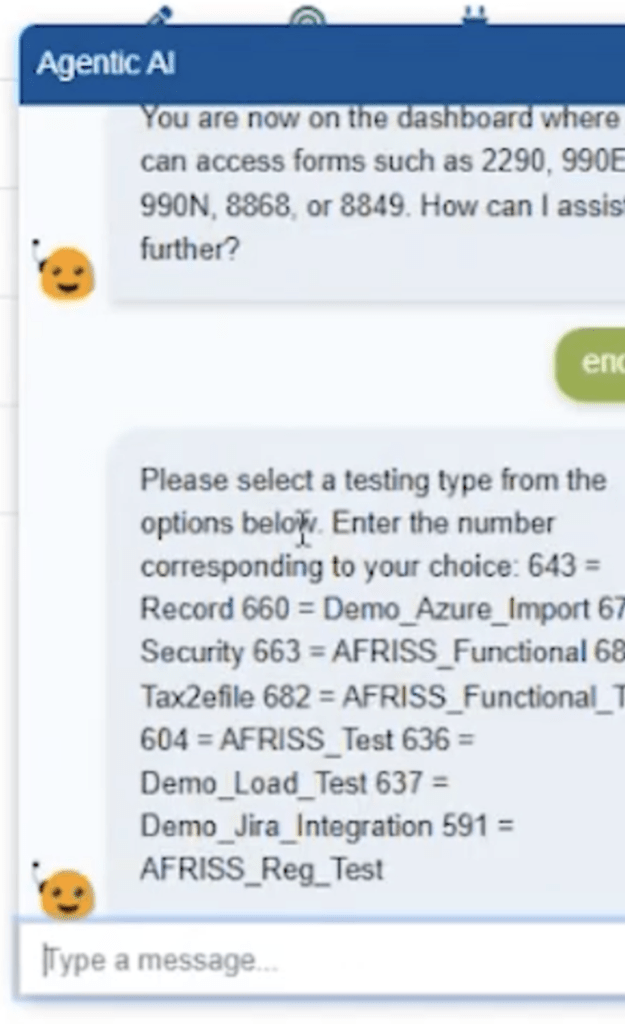
Now select the test case you’d like to populate with test data. We pick 678 for this example.
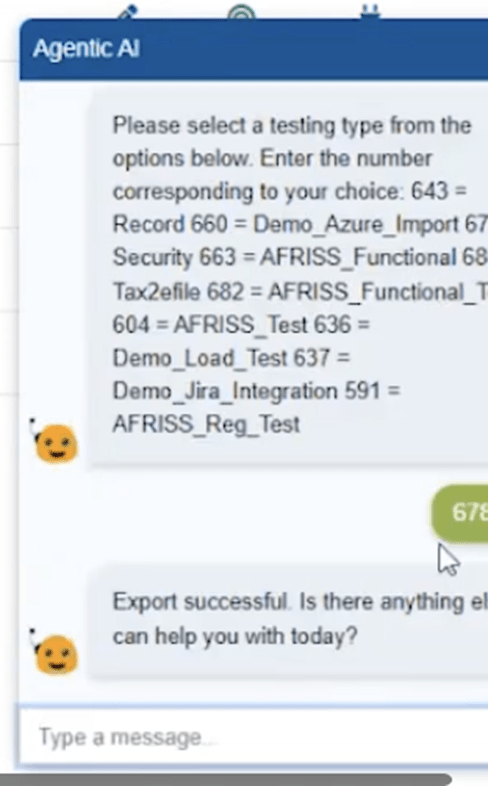
And that’s it. The test is complete, and test results have been exported to TestWheel. You can see test data under the “Application Data” tab. All steps are recorded precisely so you can scan through the results, one user action at a time.
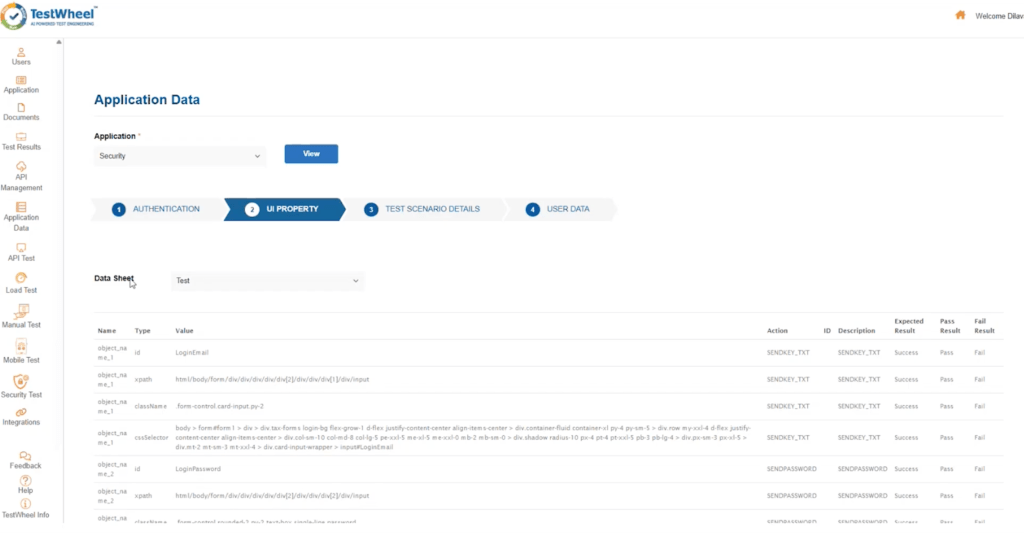
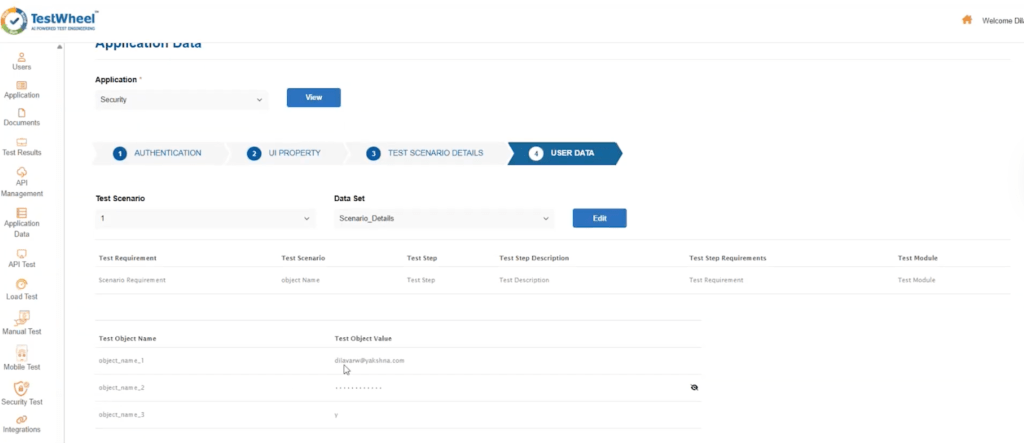
All this data can be edited by authorized users. You can provide a specific data table, sheet names, test case names, step names, and so on. Change user data as and when you need to, and run the test from the “Applications” tab.

Excel-Based Test Authoring
TestWheel enables Excel-based workflows for structured test creation. This is a simple low-code approach to automating your manual tests and to start generating consistent tests on TestWheel.
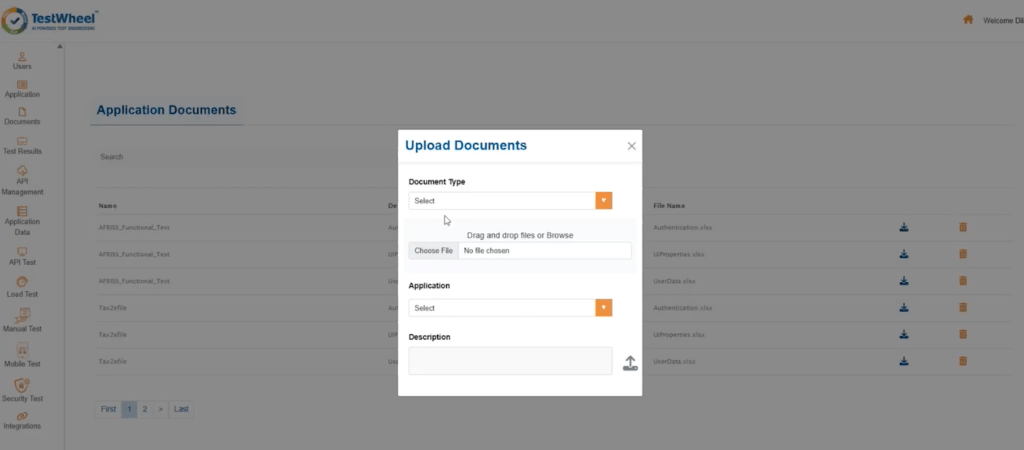
- Navigate to the “Documents” tab. You’ll be able to download Excel sheets for authentication data, UI properties, and user data.
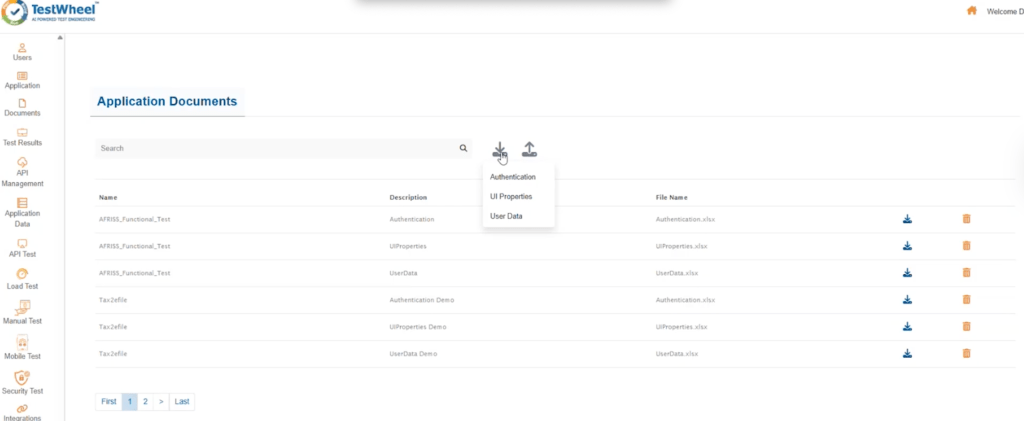
- Here’s what those downloaded sheets look like:
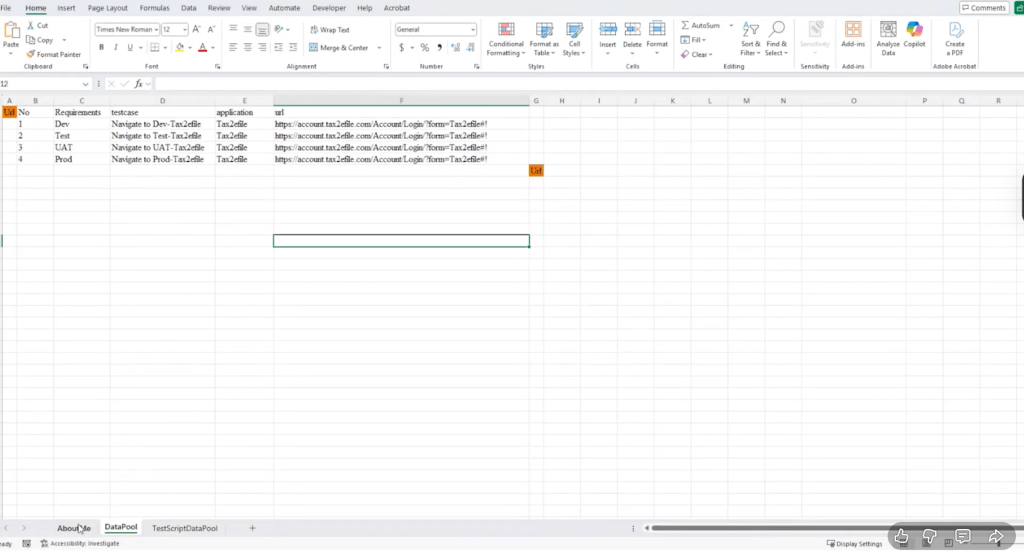
Here, you can select/enter the URLs to test. You can customize the URL for four environments: Dev, Test, UAT, and Production.
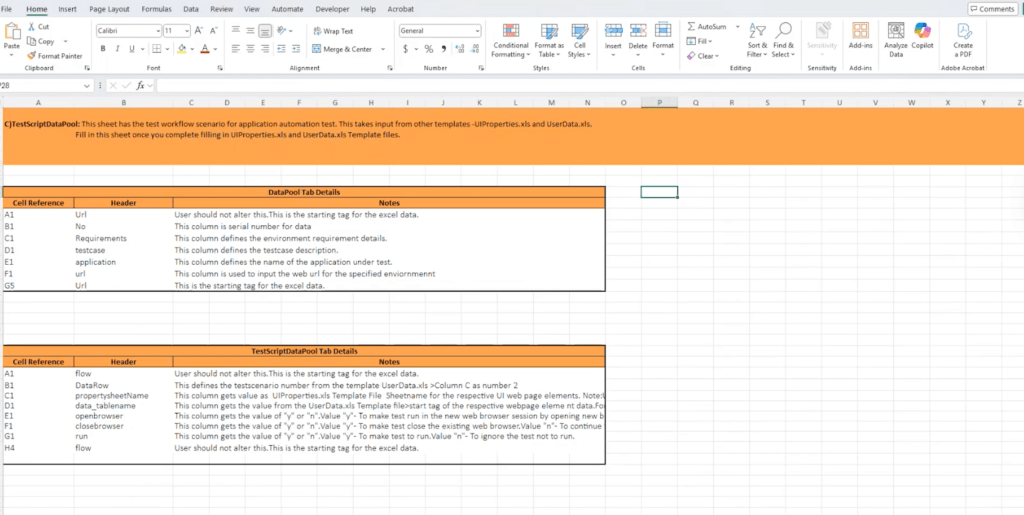
This hosts the actual UI’s test data. You get an “about us” section, and cells to fill in with test step names, types, values, actions, pass/fail parameters, and actual results.
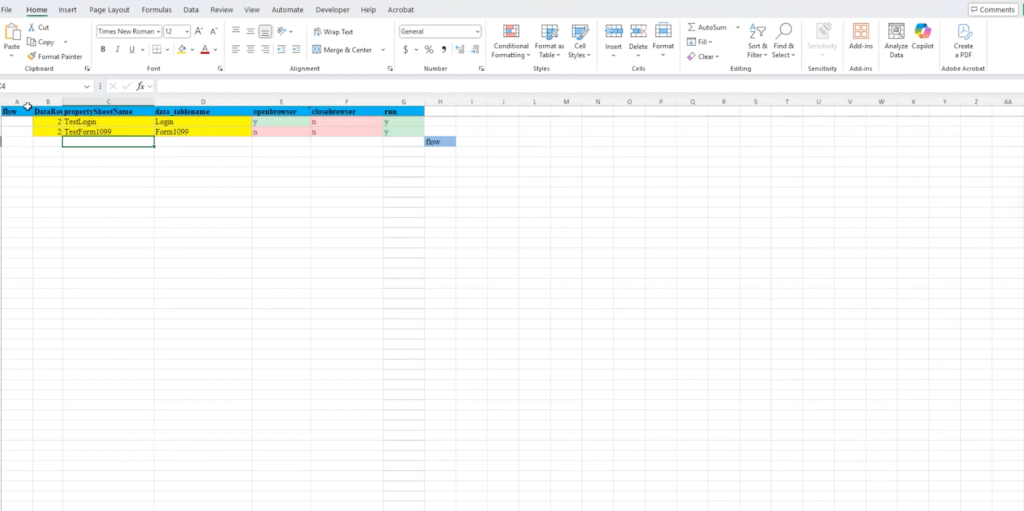
Here, you can house your application’s workflow itself. Populate it with steps and pass/fail criteria. For this specific test case, you’ll see a test login and a test form.
- Once you populate these data sheets, go back to the “Documents” tab. Reupload the sheets you just customized with your data.
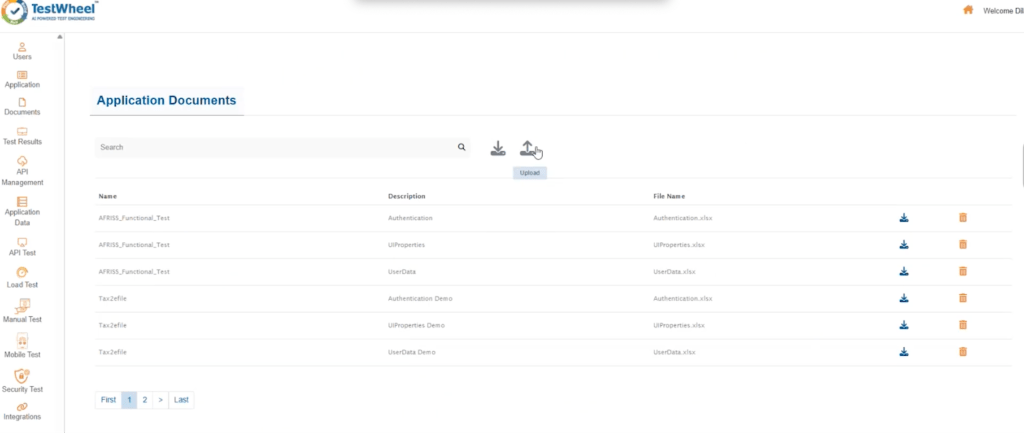
- Map the sheets to a specific application when you reupload them.
- Navigate back to the “Applications” tab and test the application as we showed earlier in this piece.
Note: TestWheel offers easy integrations with Jira and Azure DevOps to simply test creation with your existing stack.
API Testing
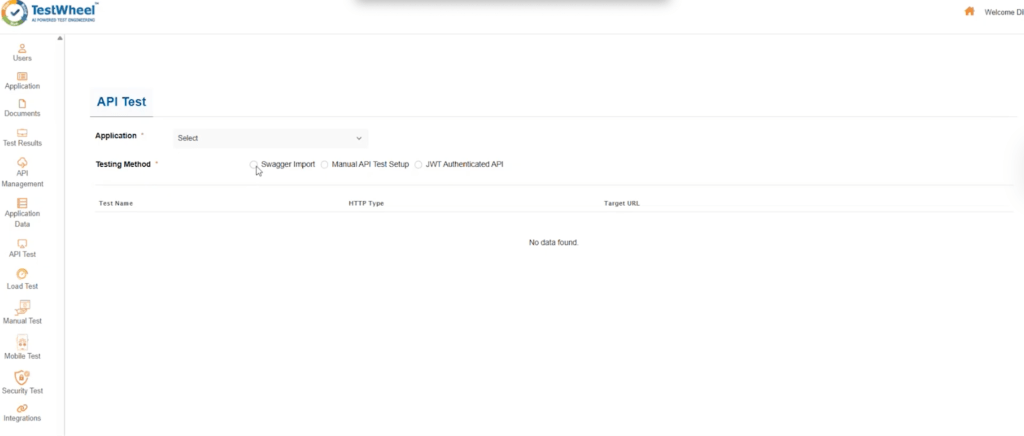
TestWheel allows API testing in three forms. You can use a Swagger import, a manual API test setup, and a JWT-authenticated API. Here’s how:
The Swagger Import
- Go to the “API Management” tab.
- Select the “Swagger Import” option.
- Choose an application under which to slot your tests. You can create a new application from the “Application” tab, as shown before.
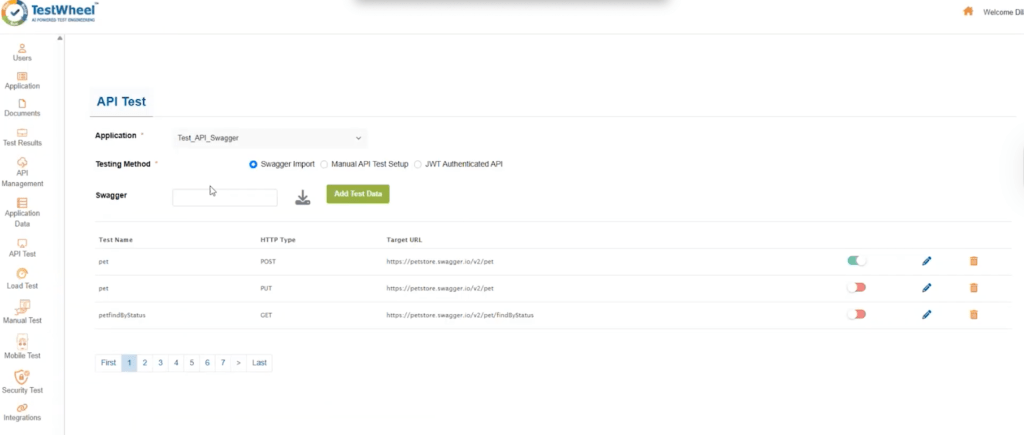
- Type in your URL in the “Swagger” field, and the system will immediately populate the test field with your Swagger-imported API tests. You can see the tests already imported in this screenshot.
- Add your test data: test name, HTTP type, target URL.
- Go back to the “Application” tab. Choose the application you just created, and initiate tests.
Manual API Test Setup
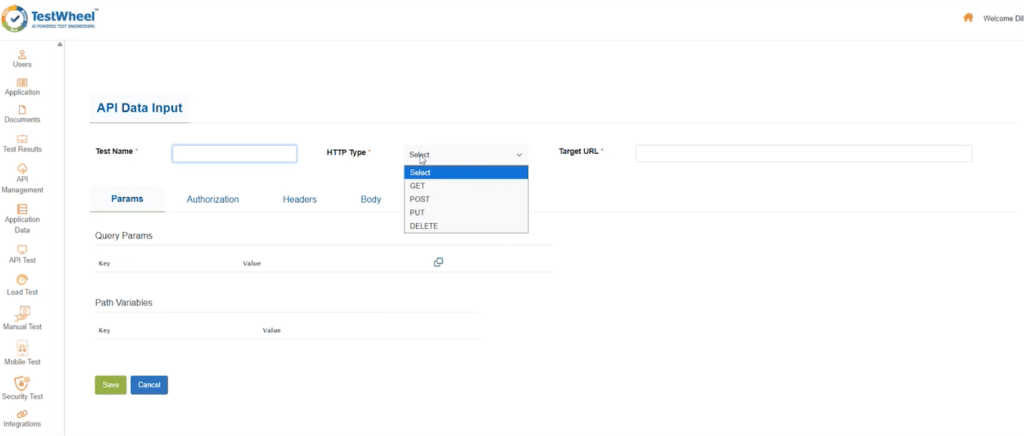
- Choose the “Manual API Test Setup” option from the “API Management” tab.
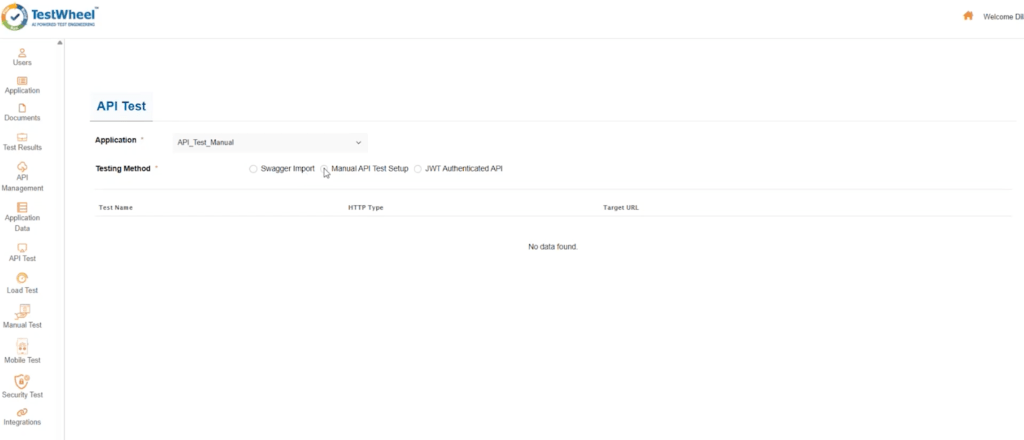
- Add test name, HTTP type, target URL, and any parameters. Also, add authorization, headers, and body (expected and request bodies).
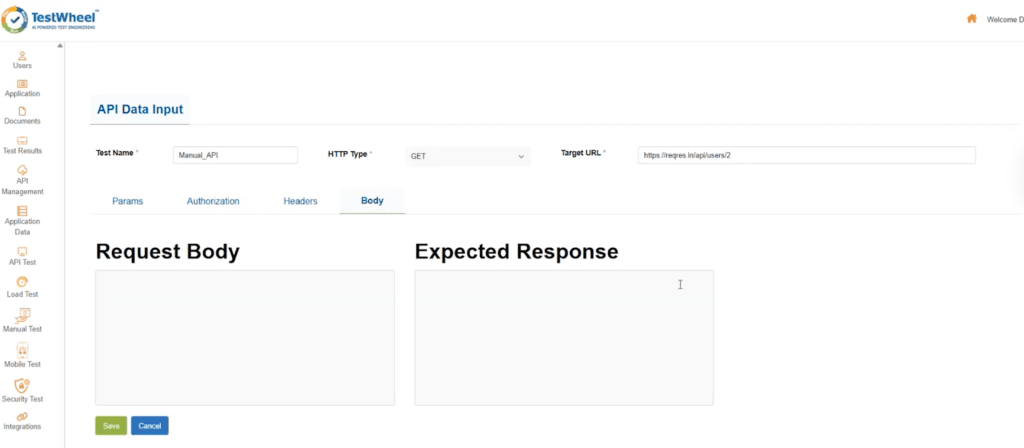
- Click “Save”.
- Go back to the “Applications” tab and run the test.
JWT Authenticated API Test
- Choose the “Manual API Test Setup” option from the “API Management” tab.
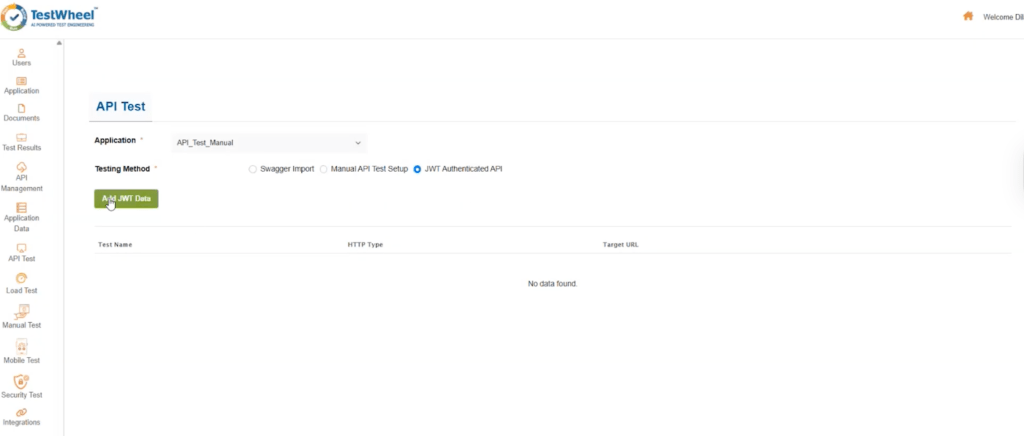
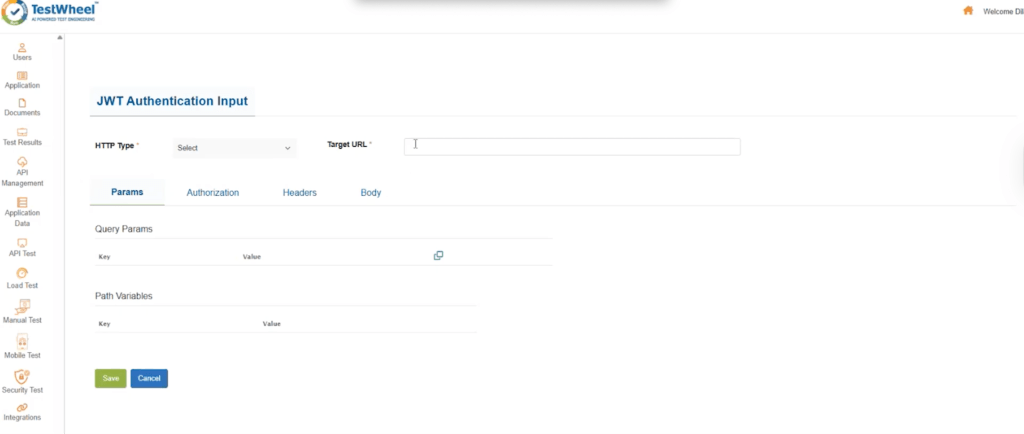
- Create your test case. Enter your JWT data. Add your authentication inputs.
- Return to the “Applications” tab. Run the test as usual.
Note: The API management module allows any user to trigger tests from anywhere. Once the application is registered, you can trigger the test from anywhere in the CI/CD pipeline. Integrate with Jenkins and Azure DevOps; then the system will trigger tests and generate reports.
Performance/Load Testing
TestWheel offers JMeter-based load testing via a few simple steps.
- Go to the “Load Test” tab.
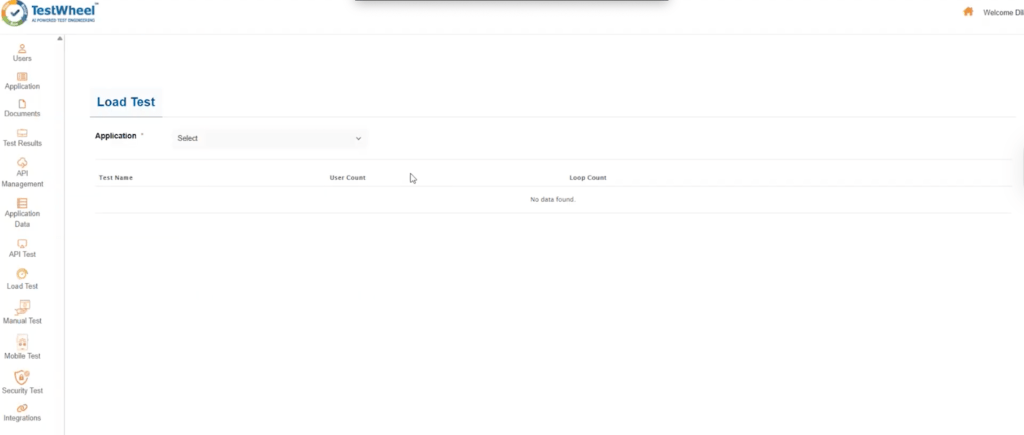
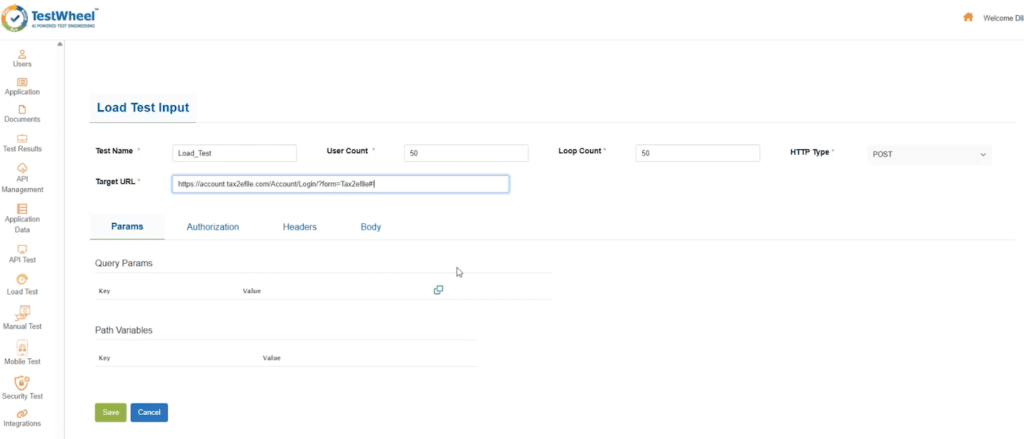
- Add your test case.
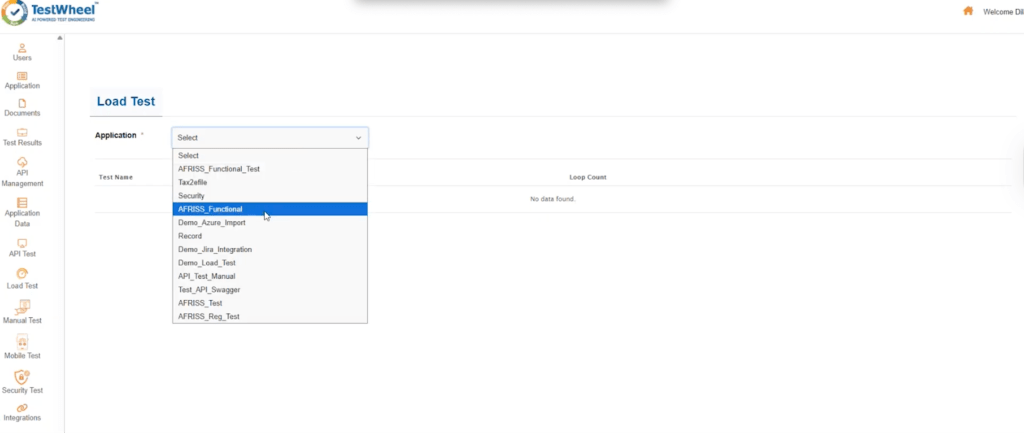

- Add the test name, user, and loop count. Select your HTTP type. Enter the target URL. Click Save.
- Go back to the “Applications” tab. Run the test as usual.
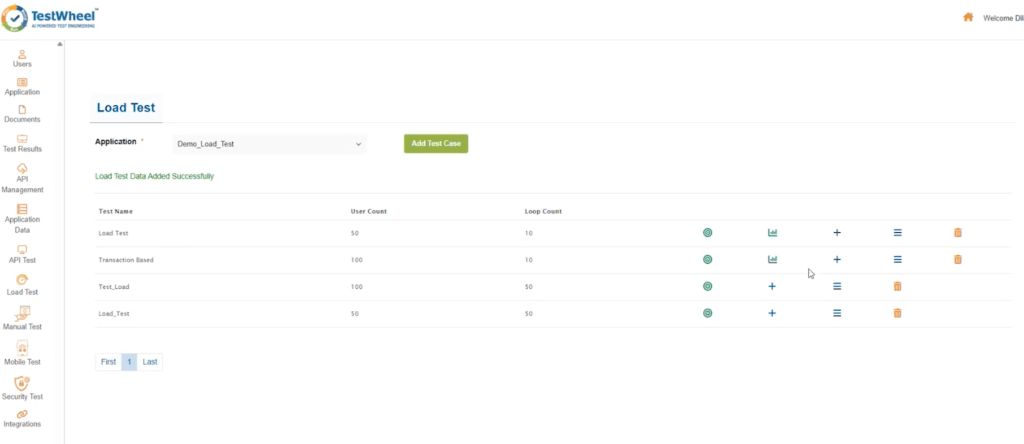
TestWheel also supports transaction-based load testing.
- View test details of any test by clicking on the “menu” icon.

- For this test, you’ll see three steps for the URLs to get hit. Each one gets hit with 100 users at a 10-loop count.

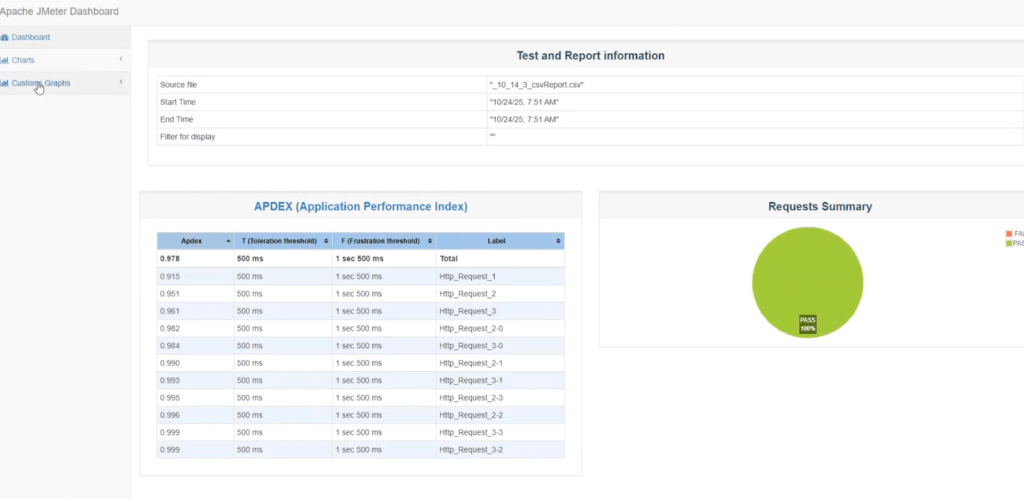
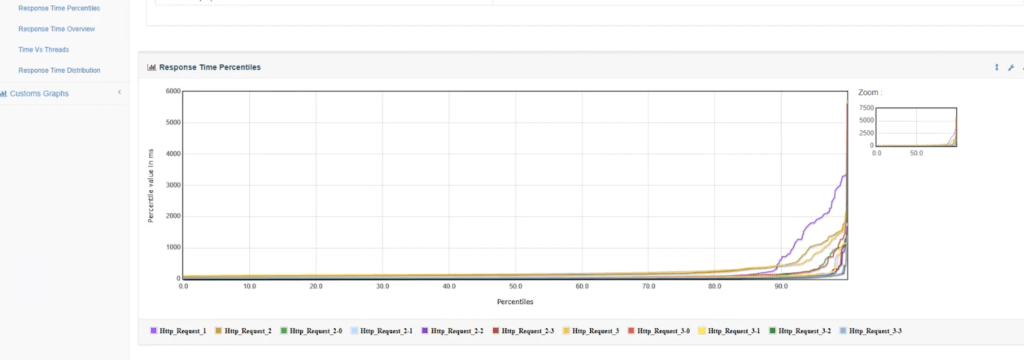
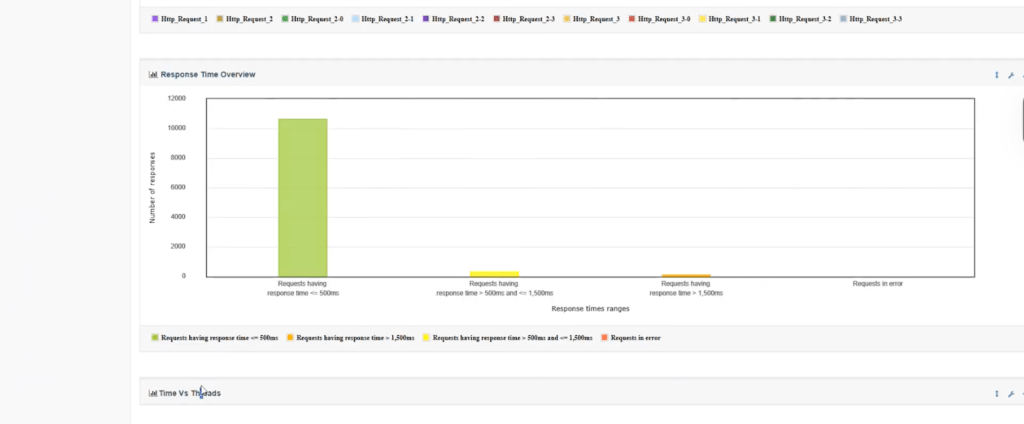
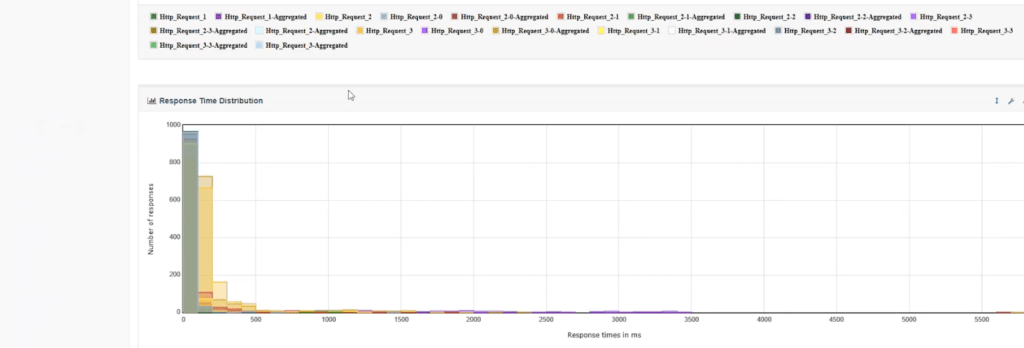
Once you run your test, you can get insights on apex metrics, i.e., response times, throughput, and error rates.
- Just click this icon on the “Load Test” page.

The report will automatically download as a .zip file, which looks something like:
And that’s how simple automated testing can be.
It’s free.